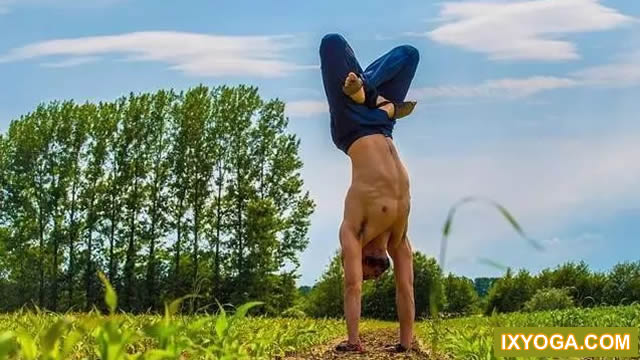
Dolphin pose is the basic practice of inverted three-dimensional posture
.
It opens the shoulders and strengthens the upper body, strengthens the arm strength, exercises the leg muscles, and the leg strength will be better
.
So, do you think this omnipotent posture should practice the effect of dolphin pose: 1
.
Strengthen the leg muscles, make the leg lines more beautiful, more compact, and effectively improve the radish legs
.
2
.
Strengthen the arm strength, open the shoulder and relieve the shoulder neck problems
.
3
.
Strengthen the upper body and effectively relieve the discomfort of the waist and back
.
4
.
Accelerate blood circulation, nourish facial skin and strengthen internal organs
.
2
.
Inverted three-dimensional basic practice
.
When you have laid a good foundation, handstand will follow naturally
.
Yoga_ In this error diagram, we can clearly see a lot of problems
.
From the head, practitioners will habitually keep a distance from the ground and lift their heads up, which will squeeze the neck
.
From the back, we can see that some friends will squeeze their upper body, or even bend their spine
.
From the lower body, we can see that some friends will squeeze their upper body, or even bend their spine, Some exercisers do not use force in their legs during the practice, which leads to the phenomenon of bending, and the heel will be used to lifting up at the same time
.
Dolphin pose: the basic pose of Yoga handstand! Dolphin style – key points of correct posture: ↑ from the correct diagram of dolphin style practice, the head should naturally droop, the ears should be close to the inside of the big arm, push the shoulder blade to the chest, feel the extension of the spine, try to lift the hip to the sky, raise the back of the knee, keep a straight line, and press the heel down at the same time, not up
.
The right and wrong comparison diagram of dolphin style put two right and wrong comparison diagrams together to compare
.
It is not difficult to see that the wrong action will present a sense of body tension
.
If you practice according to the wrong diagram, the practitioner will not feel the sense of body stretching
.
This is a complete illustration of the dolphin pose
.
The dolphin pose opens and strengthens the upper body
.
You can use it to do the inverted three-dimensional preparatory pose
.
When you are not ready to raise your legs over your head, it is also a good alternative
.
Whether you practice the dolphin pose for comfortable handstand or as a prelude to the peacock dance, the value of the dolphin pose is countless
.
With continuous practice, when you get used to letting the weight fall on your hands, arms and upper body, you will experience greater and more flexible range of motion of spine and shoulders, and strength of arms and core will be established
.
In other words, if you regard them as friends, you will open a door of hope for yourself
.
The rollover in your youth will no longer be a distant memory
.
1
.
Keep your feet parallel 2
.
Release your heels backward and downward 3
.
Push your hips backward and upward 4
.
Extend your spine 5
.
Keep your forearms parallel 6
.
Press the inside of your hands and wrists into the ground 7
.
Your elbows are the same width as your shoulders 8
.
Press down from your palms to your elbows at all angles input 1
.
Lift your body with the force of pressing down
.
The first variant of dolphin style (Figure 1) is that your arms are placed in a classic handstand, and your head is not on the ground
.
It will help you stretch and strengthen your shoulders, open your middle and upper back, and many students find this area stiff
.
Kneel in the middle of the mat, cross your fingers, and slide the lowest little finger into the inside of the palm of the other hand
.
This ensures that it is flat from the outer edge of the hand to the wrist
.
Place your hands on the ground and swing your forearms in a V-shape
.
The elbows are shoulder width apart and placed a few inches in front of the shoulders
.
Keep the inside of the wrist just above the outside of the wrist (to make sure the hands don’t fall back on both sides) and press steadily from the outside edge of the hand to the elbow
.
In this position, let your forearm do something like “karate chop” to make sure that you really establish a solid connection with the ground – the ability to take root strongly makes dolphin full of vitality
.
This pressure gives you the energy to push yourself
.
Like tennis, if you just drop it, it won’t bounce very high
.
On the contrary, if you throw it hard, it will bounce and jump very high
.
So press your forearms down and use that reaction to lift your shoulders away from the ground so they don’t fall in the direction of your ears and put pressure on your neck
.
Once you have established the base of the pose and the connection between your shoulders, gaze at your feet, lift your body into dolphin pose, hook your toes back, and push your hips back and up as if you were going to enter downward dog pose
.
The forearm pushes the ground far away so that the shoulders and buttocks extend away from the elbows, and finally the elbows, shoulders and buttocks are in a straight line; then the legs are straightened, and the heels fall to the ground
.
The head is freely suspended so that there is no pressure on the neck and the front and rear sides of the trunk are evenly extended
.
If you’re soft, you may find your front ribs poking to the ground; if so, try to gently move your lower ribs a little bit to the back of your body
.
If your body is a little stiff (especially with tight hamstrings), pay attention to whether your spine is arched, try to lengthen it, and bend your knees slightly if necessary
.
Hold 10 to 15 breaths, then return your knees to the ground and sit back on your heels
.
The second variant is a version of “plate”, which can strengthen your shoulders and core (Figure 2)
.
The posture of the arm is the same as the inverted three-dimensional “Peacock Dance”
.
Stiff shoulders often open the elbows and slide the hands toward each other
.
Using a brick and a strap can prevent this and help you find the right position
.
Take a belt in a circle
.
Place the loop just above your elbow; pay attention to the width when tightening the strap, so that the elbow spacing is the same as the shoulder width
.
Next, lay a brick flat on the front of the mat
.
The thumb and index finger of both hands are placed on both sides of the brick in L-shape, and the thumb and index finger frame the lower edge of the brick
.
Once you’ve built your foundation, step back and keep your body straight, like a board
.
Open your feet as wide as your hips, and your heels are just above your mounds
.
Place your shoulders directly above your elbows, and your hips are shoulder high
.
To activate the core, extend the sternum forward while pushing the heel back, retract the tailbone inward and lift the thigh toward the ceiling
.
These forces allow you to tighten the core and you will feel your lower abdomen supporting your lower back
.
Strengthening your abdomen will benefit all your postures, especially the inverted three-dimensional
.
Gaze gently ahead for 10 to 15 breaths
.
Don’t fall to the ground and lift your shoulders
.
For the final pose of the dolphin, use the basic shapes and movements in the first variant, combined with the more challenging arm positions in the second
.
Keep your forearms parallel to each other, wrist and elbow apart, shoulder width apart
.
Put your toes back and push your hips back and up
.
Notice that it’s more difficult to keep your elbows from moving without the help of bricks and straps
.
If you need aids to keep your forearms parallel to each other, use them
.
When the elbows are stretched out, the upper end of the big arm bone collapses forward, causing compression in the neck and upper back areas that you want to avoid in dolphin and other inverted poses
.
Press down on the ground from the wrist to the elbow so you can push your shoulders and hips away from the base of the pose
.
In particular, the inner edges of the hands and wrists should be rooted down, as they tend to turn up in asana
.
As you stretch your hips back and up, tuck your shoulder blades into your chest and push your chest toward your thighs – these movements will help you open your shoulders and upper back
.
If you’re too soft, make sure you don’t over stretch the front side of your body when doing this, causing your front ribs and armpits to pull too far toward your legs.
.