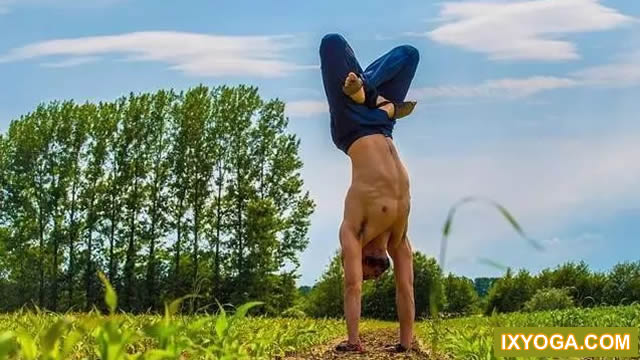
Shoulder handstand is the mother of yoga postures, a panacea for most common diseases, and a good way to detoxify and lose weight
.
The importance of Yoga shoulder handstand cannot be overemphasized
.
The advantages of shoulder handstand 01
.
Improve the blood circulation of the shoulder and neck
.
Shoulder handstand is an inverted three-dimensional form that supports the whole body weight through the shoulder
.
In the process of practice, the shoulder is in the center of gravity of the body, so that the blood circulation in the shoulder and neck is more smooth, and at the same time, it can effectively eliminate the pressure of the shoulder and neck
.
02
.
Promote the balance of the body
.
When the shoulders stand upside down, the body presents a “triangle” state
.
This posture exercises the strength and toughness of the muscles of the shoulders, legs, buttocks and limbs, and effectively promotes the sense of balance of the body
.
When the body is in the inverted state, the venous blood in the body will flow to the various organs of the body under the action of gravity, which is conducive to the smooth flow of Qi and blood in the whole body
.
It can relieve the symptoms of qi stagnation and blood stasis
.
04
.
Enhance memory shoulder handstand can promote the body to deliver more sufficient blood and oxygen to the brain, and the blood of the brain can be fully returned, so the brain nervous system can be effectively regulated, so that the brain is in a relatively active state
.
Therefore, long-term adherence can enhance memory
.
Step 1: put a yoga mat on three folded blankets; lie down with your neck, shoulders and back on the blankets; land your head on the ground, stretch your legs and tighten your knees; push your inner feet back and press your outer shoulders in the direction of the mat; lift the upper part of the spine, but push the lower part of the spine under the blanket; extend your arms outward , arms close to body; · lift and extend sternum without moving head
.
Step 2: · wrap the shoulder backward, and the shoulder blade is close to the inside; · turn the upper arm outward slightly, and extend the inside of the arm toward the little finger; · exhale and bend the knee
.
Step 3: · exhale without moving the trunk; · lift the hips and hips off the ground and bring the knees to the chest
.
Step 4: · put your hands on your hips and press down the blanket with your elbows; · lift your trunk until your hips are perpendicular to the ground and bring your knees to your head
.
Step 5: · now, slide your hands down to the middle of your back so that your palms cover your kidneys; · between your thumbs face the front of your body, and the tips of your fingers face the spine; · exhale and lift your torso, hips, and knees up; · until your chest touches your chin, breathe evenly
.
Step 6: · lift your feet to the ceiling with only the back of your neck, shoulders and upper arms on the blanket; · make sure your body is perpendicular to the ground from shoulders to knees
.
Step 7: · press your hands into your back, straighten your toes from your armpits, and stretch your whole body
.
The spine must be straight; · keep your elbows close to your body, which helps to expand your chest; · in order to further lift your trunk, release your palms, and then press your back with your palms again, which will further push your chest up; · start lifting your whole body from the back of your neck instead of your throat, and push it back Shoulders, so as to relax and extend the neck, extend the inside and outside of the legs towards the ceiling; don’t let the legs sway back and forth, keep this posture for 2-3 minutes, and breathe continuously and evenly
.
The advanced stage of shoulder handstand is to inject life energy into the spine
.
The energy of the spine should flow into the body through the fingers
.
The eyes should lock the sternum so that you can be firm and stable
.
The thumb presses the back muscle to push it to the spine
.
This will tighten the back
.
In this posture, the back should be narrow and the chest expanded
.
Don’t let the two legs move Abduct your elbows and fold your elbows in; · if your elbows are too wide apart, your chest will sag, keeping the center line of your nose and sternum in line; · move your shoulders back, focus on the inside of your legs, and stretch your legs toward the ceiling, breathing evenly
.
02
.
Self correction · in the final pose, if the legs lean to the right or left, bend the knees and move the waist so that the waist and chest are in a straight line, and then straighten the legs again; · if the trunk tilts forward, you will feel the chest heavy and difficult to breathe
.
You should push the waist, thighs and hips up, and don’t let the hips fall
.
03
.
Exit the pose · exhale, bend the knees, bring the thighs to the stomach area, and then slowly drop the hips and back toward the ground; · release the hands and both sides of the body, lie flat on the ground and relax the whole body
.
Practice reminds that neck injury is the most common part of Yoga injury, such as head handstand upright position is not good
.
If the cervical vertebra folds more than 90 degrees, it will cause inflammation
.
So in practice, let the chest raise to find the chin to activate the thyroid, not the chin to find the chest, otherwise it will lead to neck injury
.
In fact, men like this kind of woman most! After he woke up, he looked at the bright red on the bed: “check it for me, this woman, I’m going to make a decision.” the next day, “the boss found a woman of 150 Jin.”.
.