Add teacher wechat to watch the teacher’s circle of friends ~ do you always have a sore shoulder? When this problem occurs, you should pay attention to shoulder opening! Shoulder opening has always been a hot topic in yoga and an indispensable part of daily practice.

There are always small partners who complain that it is difficult to open their shoulders.

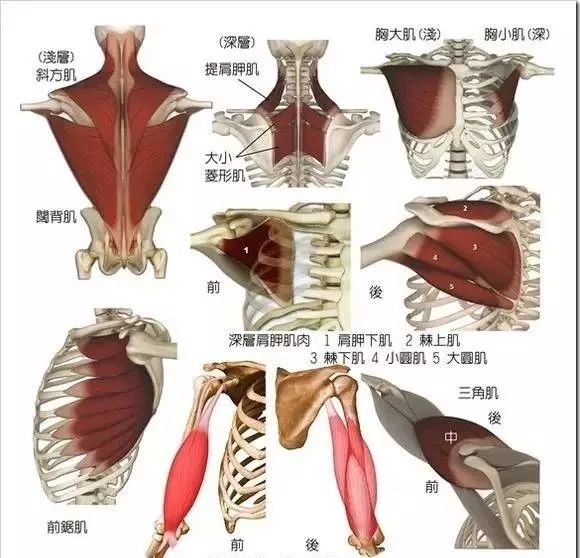
Why? There are many muscles around the shoulder joint.
Some muscle positions are not only complex, but also cross.
If the practice method is wrong, it is easy to cause adhesion, inflammation and other related problems between the muscles.
Before practice, we should first guard against two misunderstandings! 1.

Don’t use waist collapse to increase the range of shoulder opening.
Many postures that stretch shoulders and arms are prone to waist collapse.
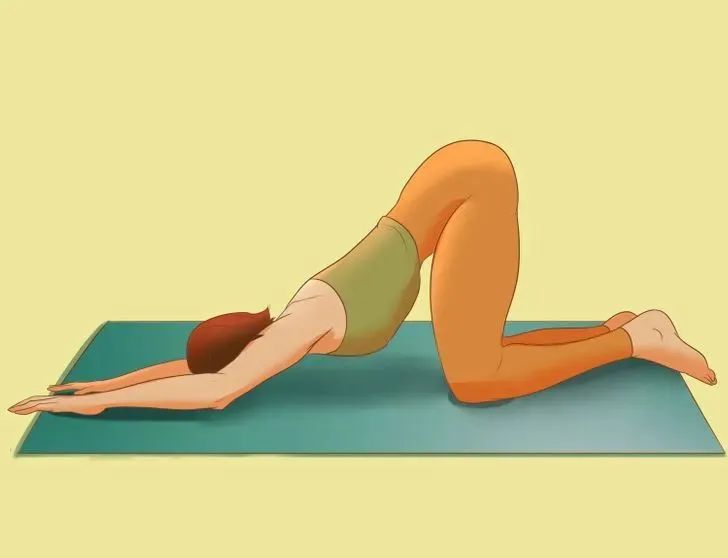
For example, in cat stretching, in order to press the armpits as much as possible, many practitioners collapse their waist without knowing it, which increases the curvature of the lumbar spine.
Over time, the spine will be worn and aged due to long-term compression, and the gain is not worth the loss.
2.
People who practice stretching should also pay attention to tightening shoulder joints at the same time.
They always want to do more stretching exercises.
But you should note that the shoulder joint is connected and fixed by some flat and long ligaments, and the range of motion is relatively large, so it is extremely unstable.
If the ligament is stretched for a long time, it will become loose.
If the ligament is loose, it can no longer be tightened and can only be operated.
So you can’t just stretch.
You should also pay attention to the practice of support at ordinary times.
Today, I share 6 Classic Yoga shoulder opening moves for everyone.
It is suitable for any basic yoga person to practice every day.
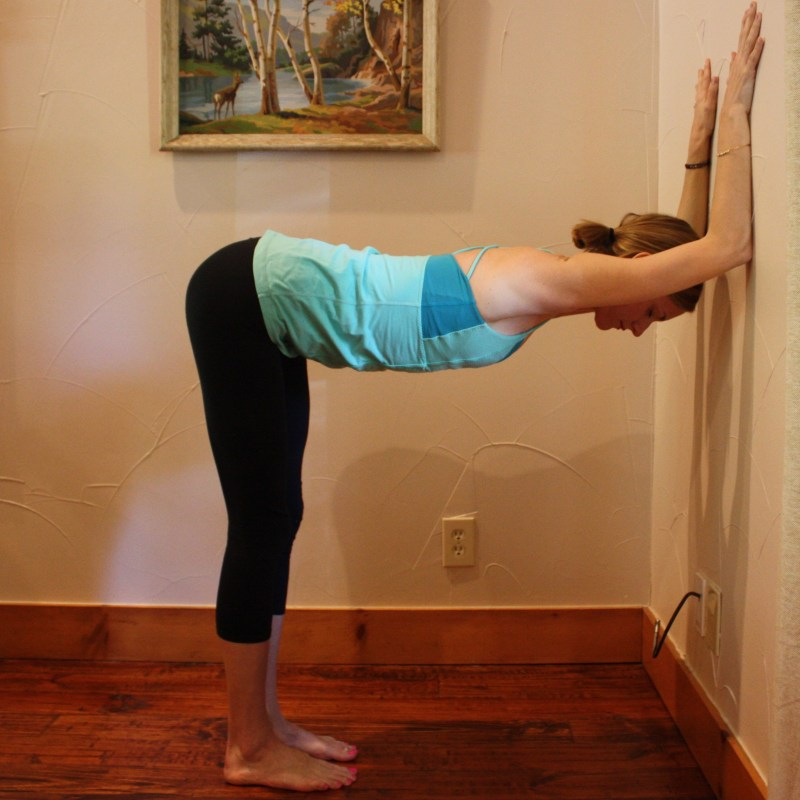
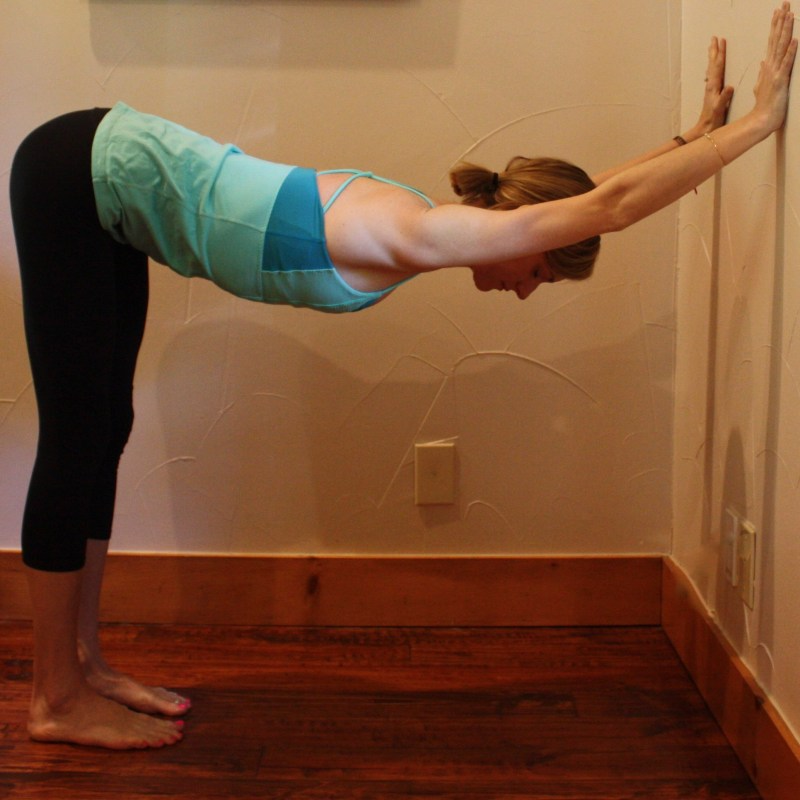
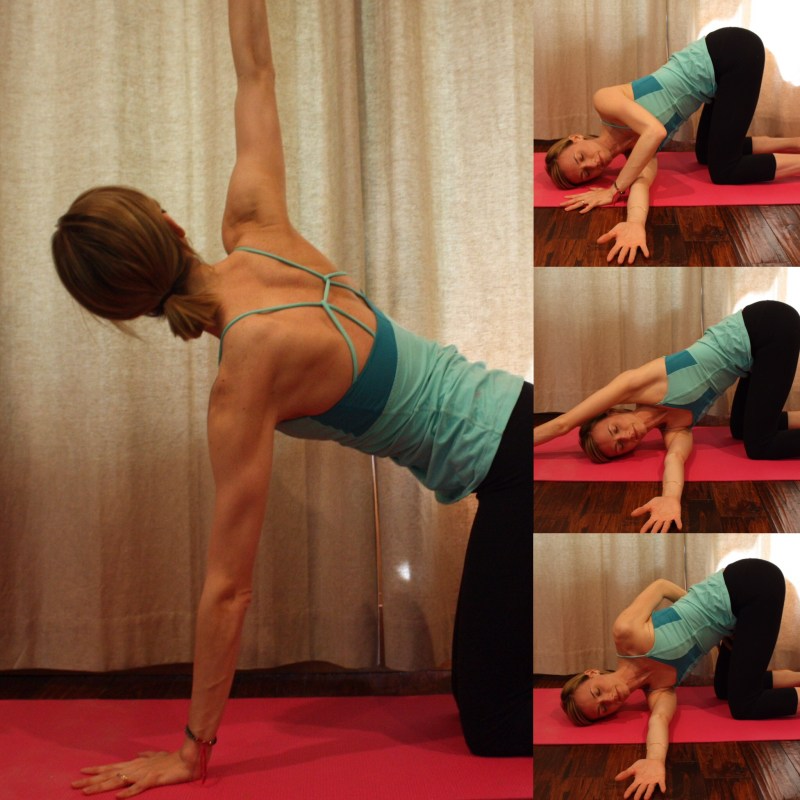
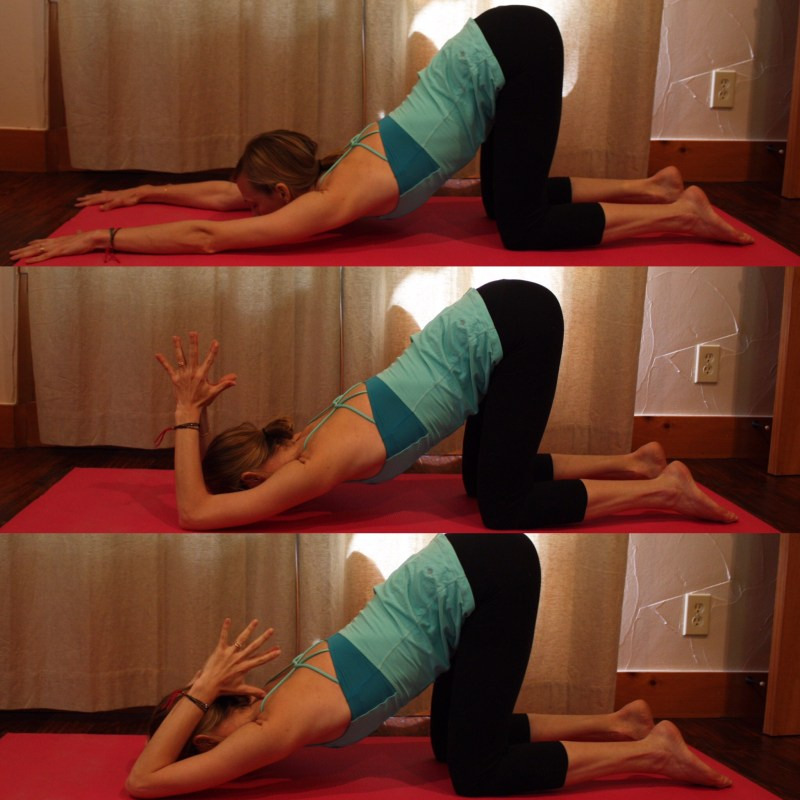
If you don’t know how to open your shoulder, try these 6 moves! Action 1-2 stand facing the wall, inhale at a distance of about one leg between the legs and the wall, push the wall with both hands, keep the core, start the chest and armpit to sink, and stay for 10-12 breaths, or you can choose to bend the palms of your elbows with your forearms close to the wall, keep the chest and armpit sinking for 10-12 breaths, 3 support the four feet to enter, put the center of gravity on your left hand, inhale, straighten your right hand upward, twist and exhale your chest, and tighten the core, The right hand passes through the left armpit, the right shoulder is placed on the middle line of the body, the left elbow is bent on the back, stay for 10-12 breaths, exchange the other side action 4, exit from the previous action, enter the pug exhale, tighten the core, bend the body forward and keep the hands straight forward, stay for 1 minute, then bend the elbows backward, stay for 1 minute, Act 5 simple sitting position, prepare to enter the bird King inhalation, put the right hand up and left hand down, wrap the forearm, and pay attention to the sinking of the shoulders The ribs are retracted and stay for 10-12 breaths.
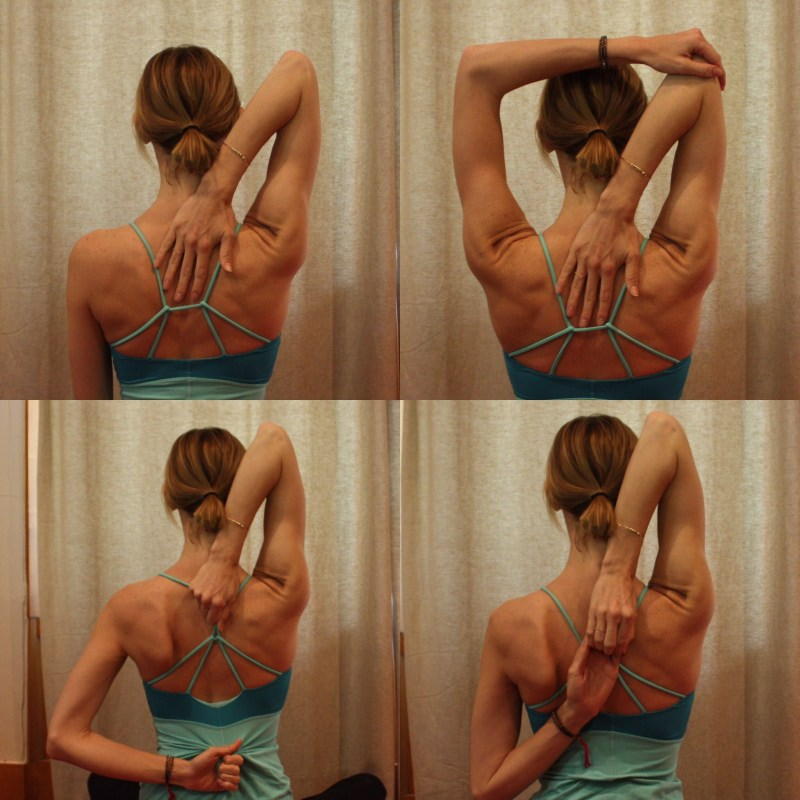
The left and right hands exchange action 6 exits from the previous action, enters the cow face breathing, straightens the right hand upward, and then bends the elbow backward to exhale.
The left hand bends the elbow on the back, and the ten fingers are buckled with each other.
For those who can’t pull their hands, they can use the extension belt to stay for 10-12 breaths, and exchange the other side ▼ old master ▼ wechat ▼ yoga ▼ music ▼ fine selection ▼ today’s Yoga people are watching..