Yoga is a kind of self-discipline integrated into your bones.

If you can, it is recommended that you practice regularly.

Even if you can’t practice every day, you should keep practicing more than three times a week.

The improvement of yoga on your body is based on regular practice.

Only regular practice can slowly bring changes to your body and mind.

Besides regular practice, it is also important to return to the basic posture frequently.

You need to recheck the movements and alignment of basic standing, backward bending, forward bending and handstand.

The following postures can really stand the test of time, that is, every practitioner should practice regularly.

1.

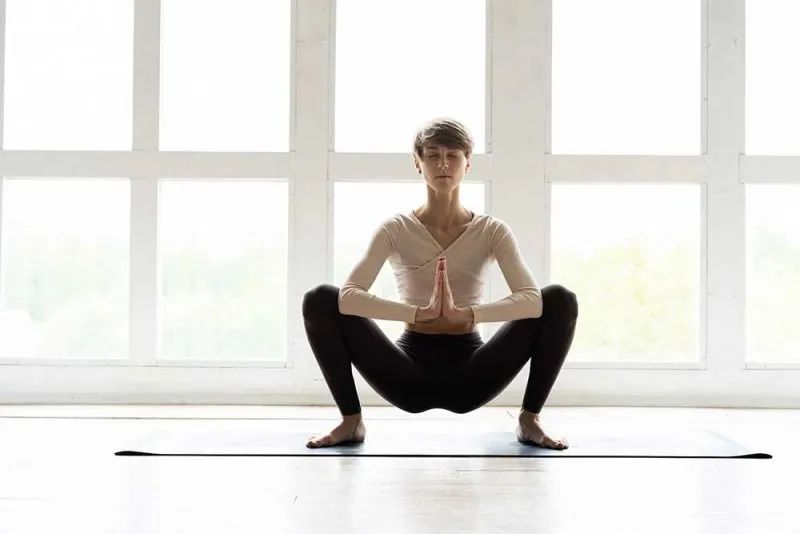
Wreath pose this pose releases the lower waist and opens the hip.

It’s important to explore changes and techniques that make this pose easier or deeper.

Beginners: it is usually difficult for beginners to put their heels down.

Make sure the heel rotates back and opens the toes.

If your knees don’t feel well, please sit on the yoga block.

Intermediate: strengthen the hip opening of this pose by putting your hands together.

Tilt forward to bring your upper arm to the inside of your leg, which will give you extra support.

Advanced: Traditionally, the full wreath style has two feet together, the torso folded forward, and the arms extended or wrapped behind the heels.

Usually, the feet are wider than the hips in this posture.

2.

Four column support This pose is the most common one in Vinyasa Yoga.

During the practice, we tend to rush in and out, which may cause injuries.
So it’s important to re-examine this pose and start thinking of it as a separate pose rather than a transition.
Beginners: many people do not have enough strength and body awareness to practice this pose well.
Knee contact is recommended.
Concentrate on lifting the lower abdomen upward to prevent it from sagging.
Intermediate: look forward to prevent the upper back from becoming round, pull the shoulders backward, focus on lowering the heart rate, and keep the elbows above the wrists.
Advanced: fully inhale in the plate, and then fully exhale into the four pillar support.
Don’t overdo it until your exhalation is complete.
This can control, raise awareness, and prevent mistakes.
3.
Triangle is a classic standing posture! This is an excellent way to release the waist, strengthen the core ability and expand the body (and mind).
Beginners: Beginners tend to twist their lower bodies and try to put their hands on the ground.
Put your hands on your calves or yoga bricks.
This allows you to stretch both sides of your chest evenly.
Intermediate: most people will incline their backs and protrude their ribs.
Concentrate on tightening your chest, keeping your lower abdomen up and down, and creating space in your lower back.
Advanced: The last step is to look up.
Align your torso with your front legs.
See if you can keep both sides of the waist even, start the abdomen and lower the waist? 4.
The crescent crescent exercises the buttocks and psoas to open the chest space.
Beginner: Beginners may have difficulty balancing.
Look down.
Make sure the front and back feet are hip width apart.
This will help you maintain balance.
Intermediate: It is usually due to the tightness of psoas major muscle connecting your lower back or back leg.
The body will lean forward and bend the back knee as much as possible to move the pelvis.
Then gently straighten your back legs.
Advanced: try adding a back bend to the upper body.
Then extend your arms to your head and clasp your fingers.
Lift your chest and keep your neck relaxed.
5.
Twist magic chair pose this pose is a good basic pose to teach us how to twist safely.
If you can learn twisting skills here, you will be safer in more advanced poses.
Beginner: Look at your knees! If you want to keep your lower back even, the best clue comes from your knees.
They shall be kept uniform.
Intermediate: fold your palms in front of your chest and press them together.
Twist the trunk, lift the chest, and make the twisting more advanced: extend your lower hand to the outside of your foot, and then extend your upper arm backward.
Keep the knee level to better open the cavity.
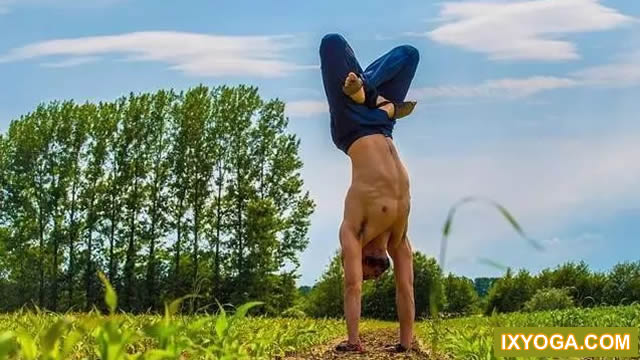
6.
Tripod handstand Tripod handstand is easy to balance because of its large foundation.
Beginners: put your head on the ground, keep your hands shoulder width apart, and stand on tiptoe to enter dolphin pose.
Concentrate on keeping your elbows in and pull your shoulders up off the ground.
Intermediate: Keep the same movement as above, but when flexible enough, walk forward with both feet, placing one knee at a time on the back of the arm.
Keep elbows and shoulders up.
Advanced: pull the knee from the arm to the chest.
Continue to pull your legs upward until they are straight, so that your legs are close to the midline throughout the process.
7.
Add a yoga brick under your lower back to support the bridge style, which can let you keep it for a long time.
It is an excellent way to release the front and spine.
Beginners: start by putting yoga bricks under your lower back.
Middle: Place the yoga block under your lower back.
Clasp your fingers in front of the Yoga brick.
Advanced: follow the above steps.
If you can hold your hands tightly and keep your arms straight, stretch one leg at a time.
8.
Camel style Camel style is a posture that many people hate.
The key is that it is difficult to be in the correct position.
Beginner: Keep your knees and feet hip width apart.
Put your hands on your hips, lower your tailbone and raise your lower abdomen to neutralize your pelvis.
With your shoulders back, place your hands on your hips and lift your chest.
Keep your hands on your hips for about 8 breaths.
Intermediate: Start in the same way as above, bend your toes, open your shoulders back and keep your arms neutral, while lowering your hands and grasping your heels.
Keep your hips above your knees and your chest up.
Advanced: Keep your feet flat.
Keep your chest up and tilt your head back.
Grasp your heels and relax your face and throat.
9.
Single Leg Head to Knee Pose This pose releases the hamstring of the straight leg calf and strengthens the hip of the bent knee leg.
Beginner: Sit on a blanket or yoga block.
Tie the yoga belt to your feet.
Hold the yoga belt and raise your hips without rounding your spine.
Intermediate: First, inhale and lengthen the spine.
When you exhale, turn your navel to face your straight leg and knee.
When grasping either side of the straight leg, please keep twisting and stretching..